3D Promo – How It Works
Create, customize, and share interactive 3D products

New Account Registration
Register an account, you must be a member of the Promotional Productsindustry as a Supplier or Distributor, and you must have a valid ASI or PPAI number.
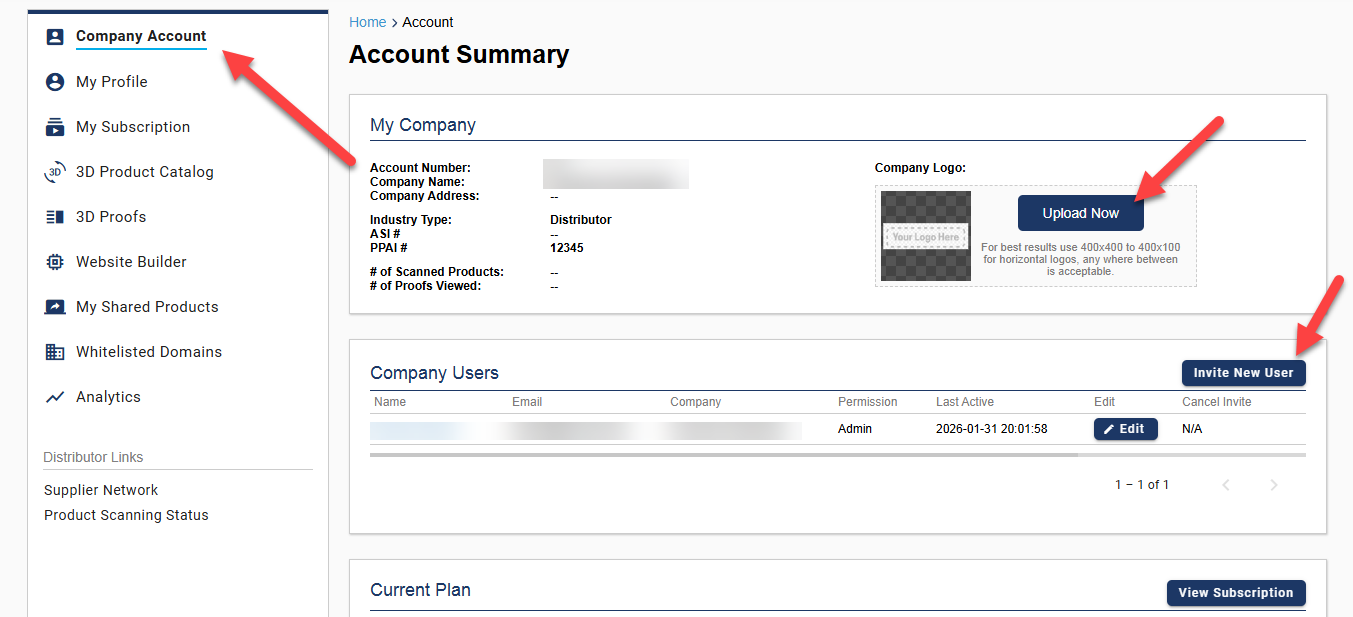
Create Your Company Account
Create and Setup your company account, remember to upload your company logo.
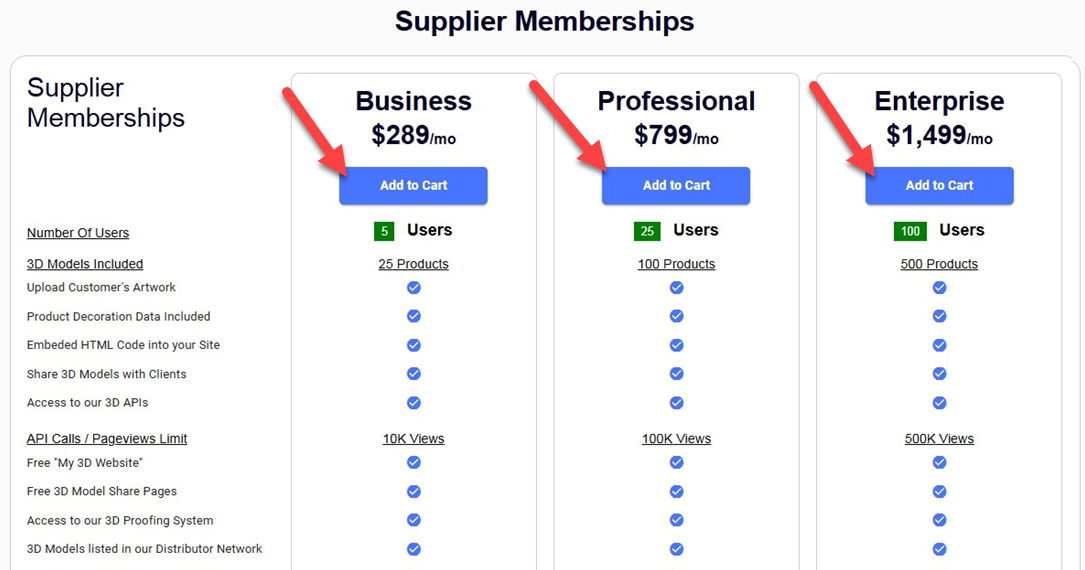
Choose a Membership Plan
Sign up for a membership plan that fits you the best!
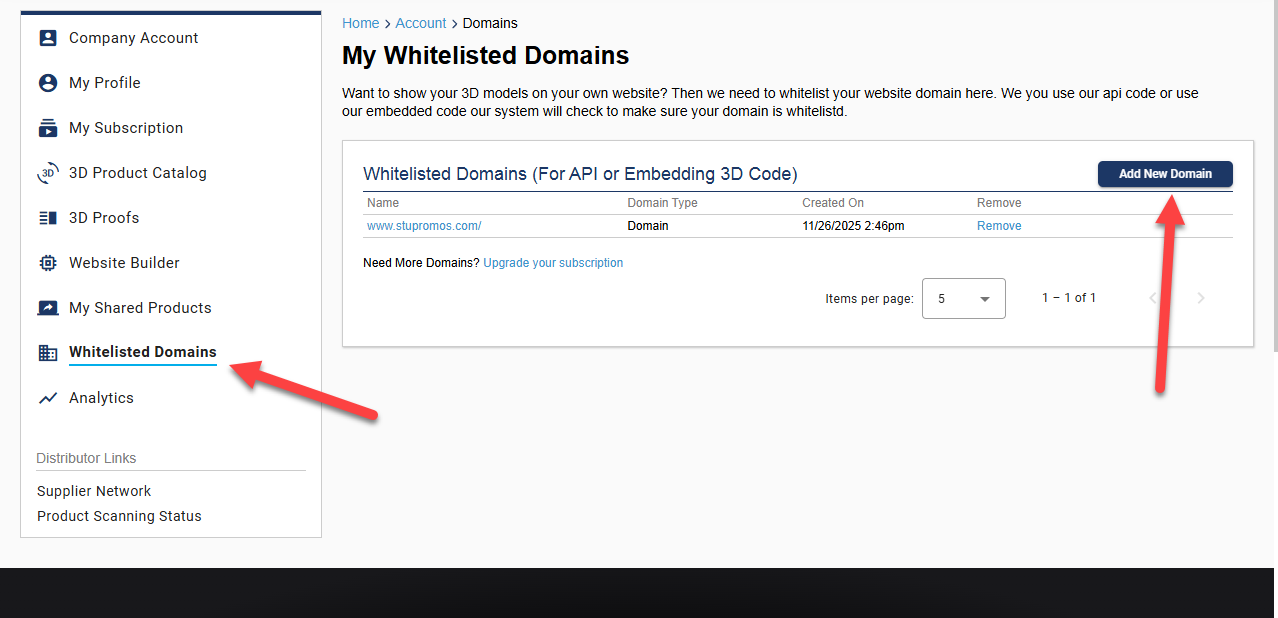
Whitelist Your Domains
Setup your website domain whitelisting, eash domain that our models are displayed on will have to be whitelisted. Add in and connect your domains here:
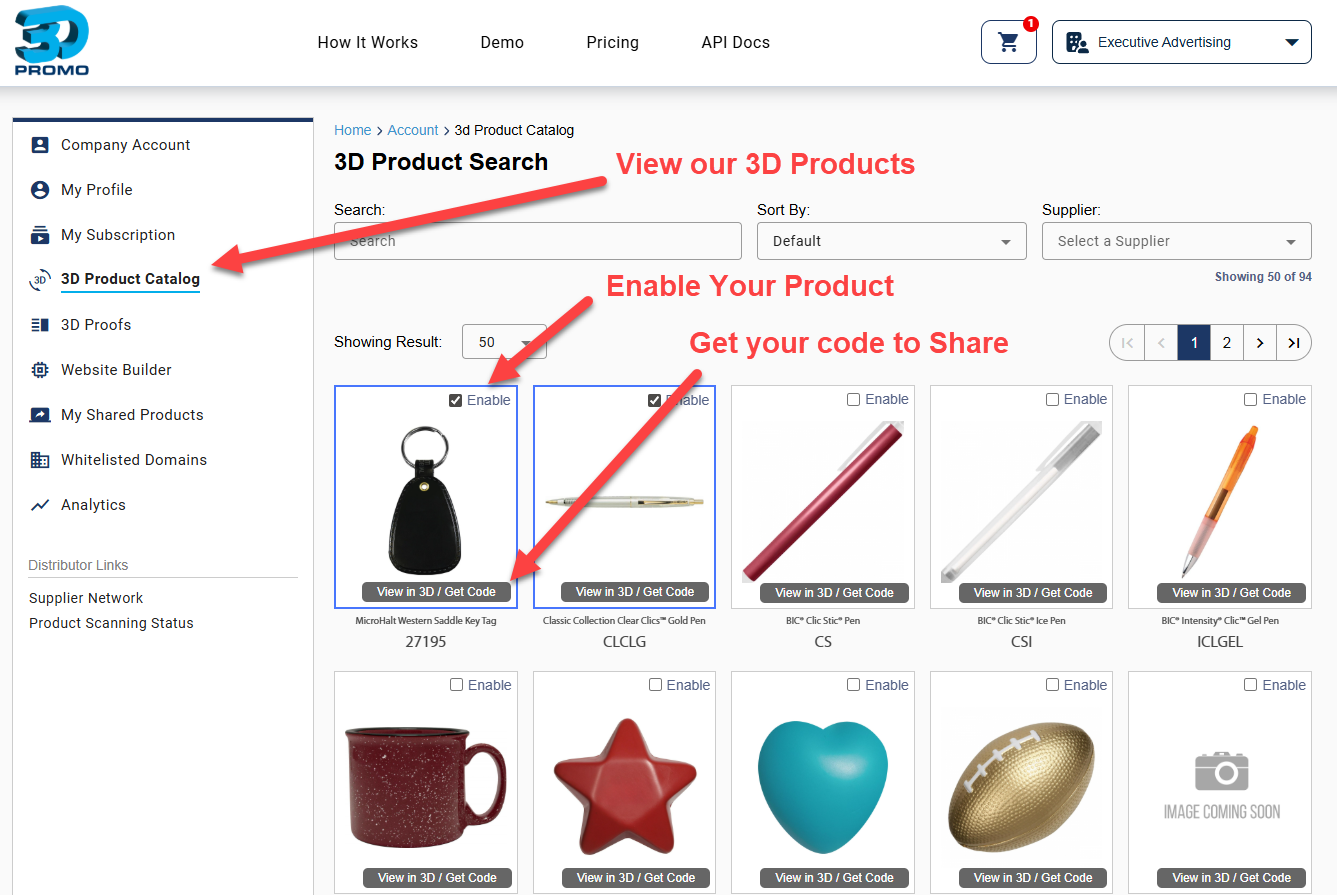
3D Product Catalog
Visit our 3D Product Catalog and Enable the products that you want to offer. If you are a Distributor you can pick from any of our Supplier products, if you are a Supplier you can pick only from your product line that has already been scanned.
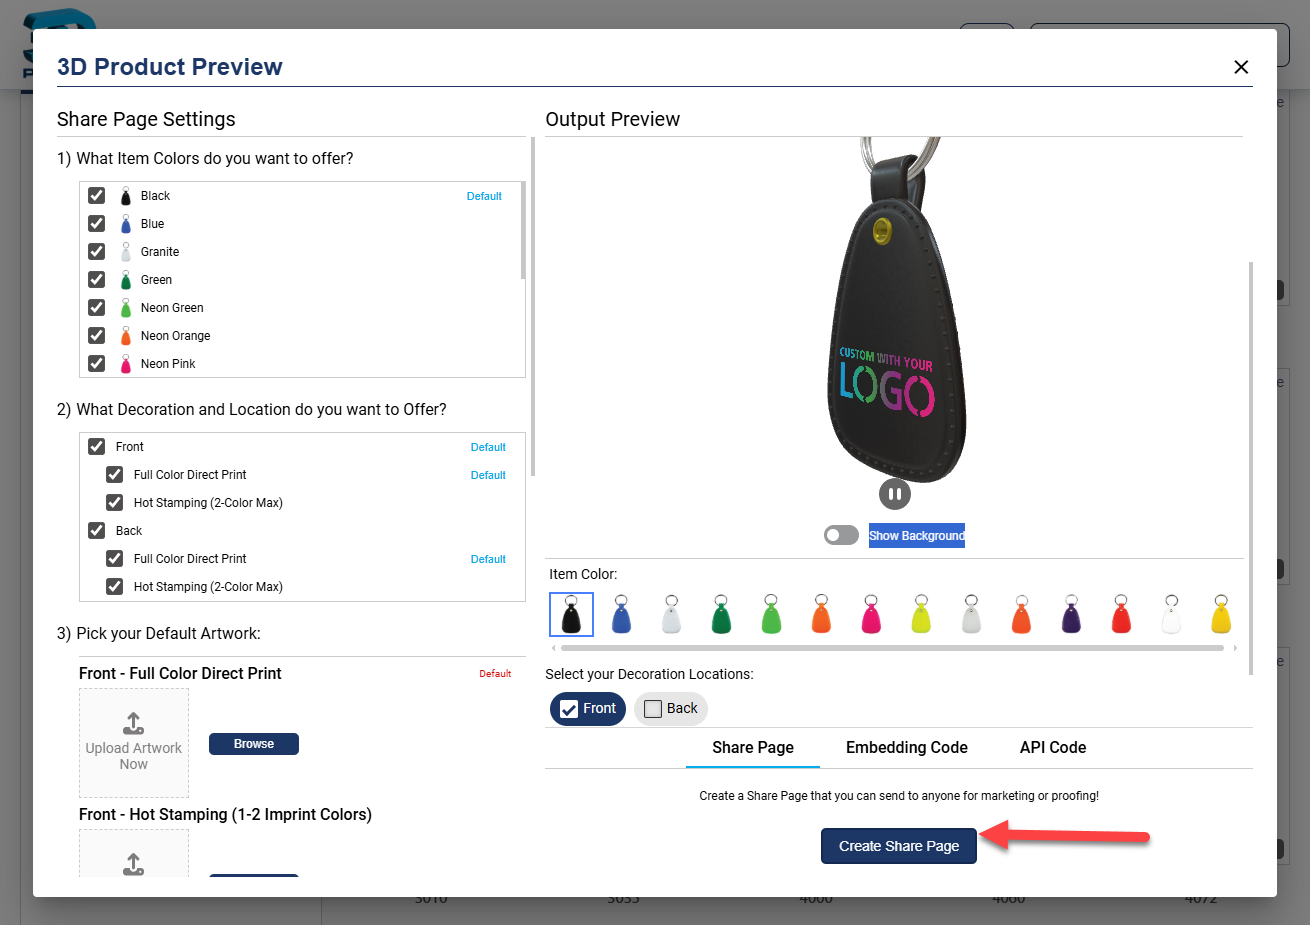
Configure Your Share Page
Once you have enabled a product click "Get Code" and begin to build your 3D Model Share Page. Here you can configure your product by removing item colors, choosing whether or not you want the customer to upload artwork, add in your default artwork, restricting imprint areas or decoration locadtions, etc. When you are done, click the "Share" button and copy your code to send to your end users.
Keep in mind that we have 3 ways to share and use our 3D Models, this example is the Share Page version, the easiest and fastest version. we also have an embedded code and API documentation.
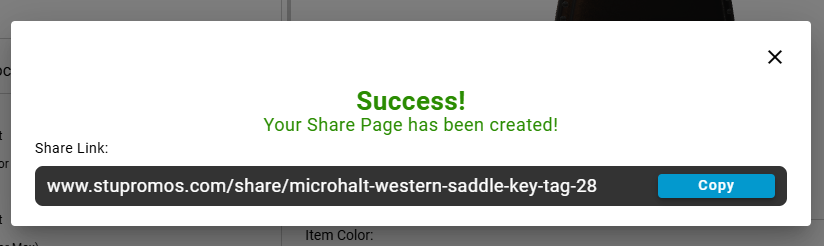
Share Your Page
Copy your code and send to anyone you want!